
Baby Yoda Craft
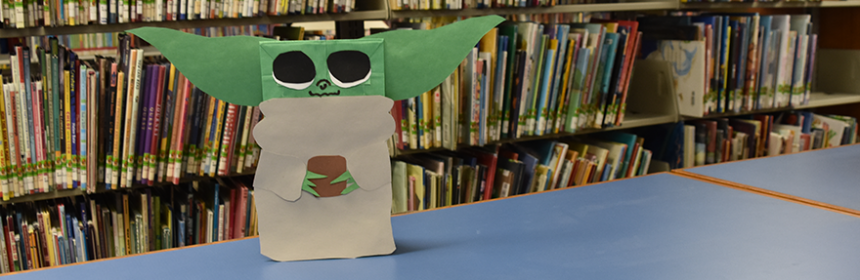
Make a Baby Yoda paper bag puppet!
Video
See below for written instructions.
Materials
- Glue
- Scissors
- Pencil/Marker
- Green Paper Bag
- You can also use a brown paper bag. However, you will need to color it green.
- Constructions Paper
- Black, brown, green, grey/tan, green and white
Steps
First, you will need to draw and cut out the pieces.
- Draw the robe on the grey/tan paper and cut it out.
- Draw the arms on the rest of the grey/tan paper and cut them out.
- Draw the mug on the brown paper and cut it out.
- Cut off a strip of green paper. Draw the hands on the strip of green paper and cut them out.
- Fold the rest of the green paper in half and draw an ear. With the paper still folded, cut the ear out to make two identical ears.
- Fold the black paper in half and draw a circle for an eye. With the paper still folded, cut the circle out to make two identical black circles.
- Fold the white paper in half and place one of the black circles on the paper. Draw a circle around the black circle, adding some extra space underneath. Cut the white circle out to make two identical circles.
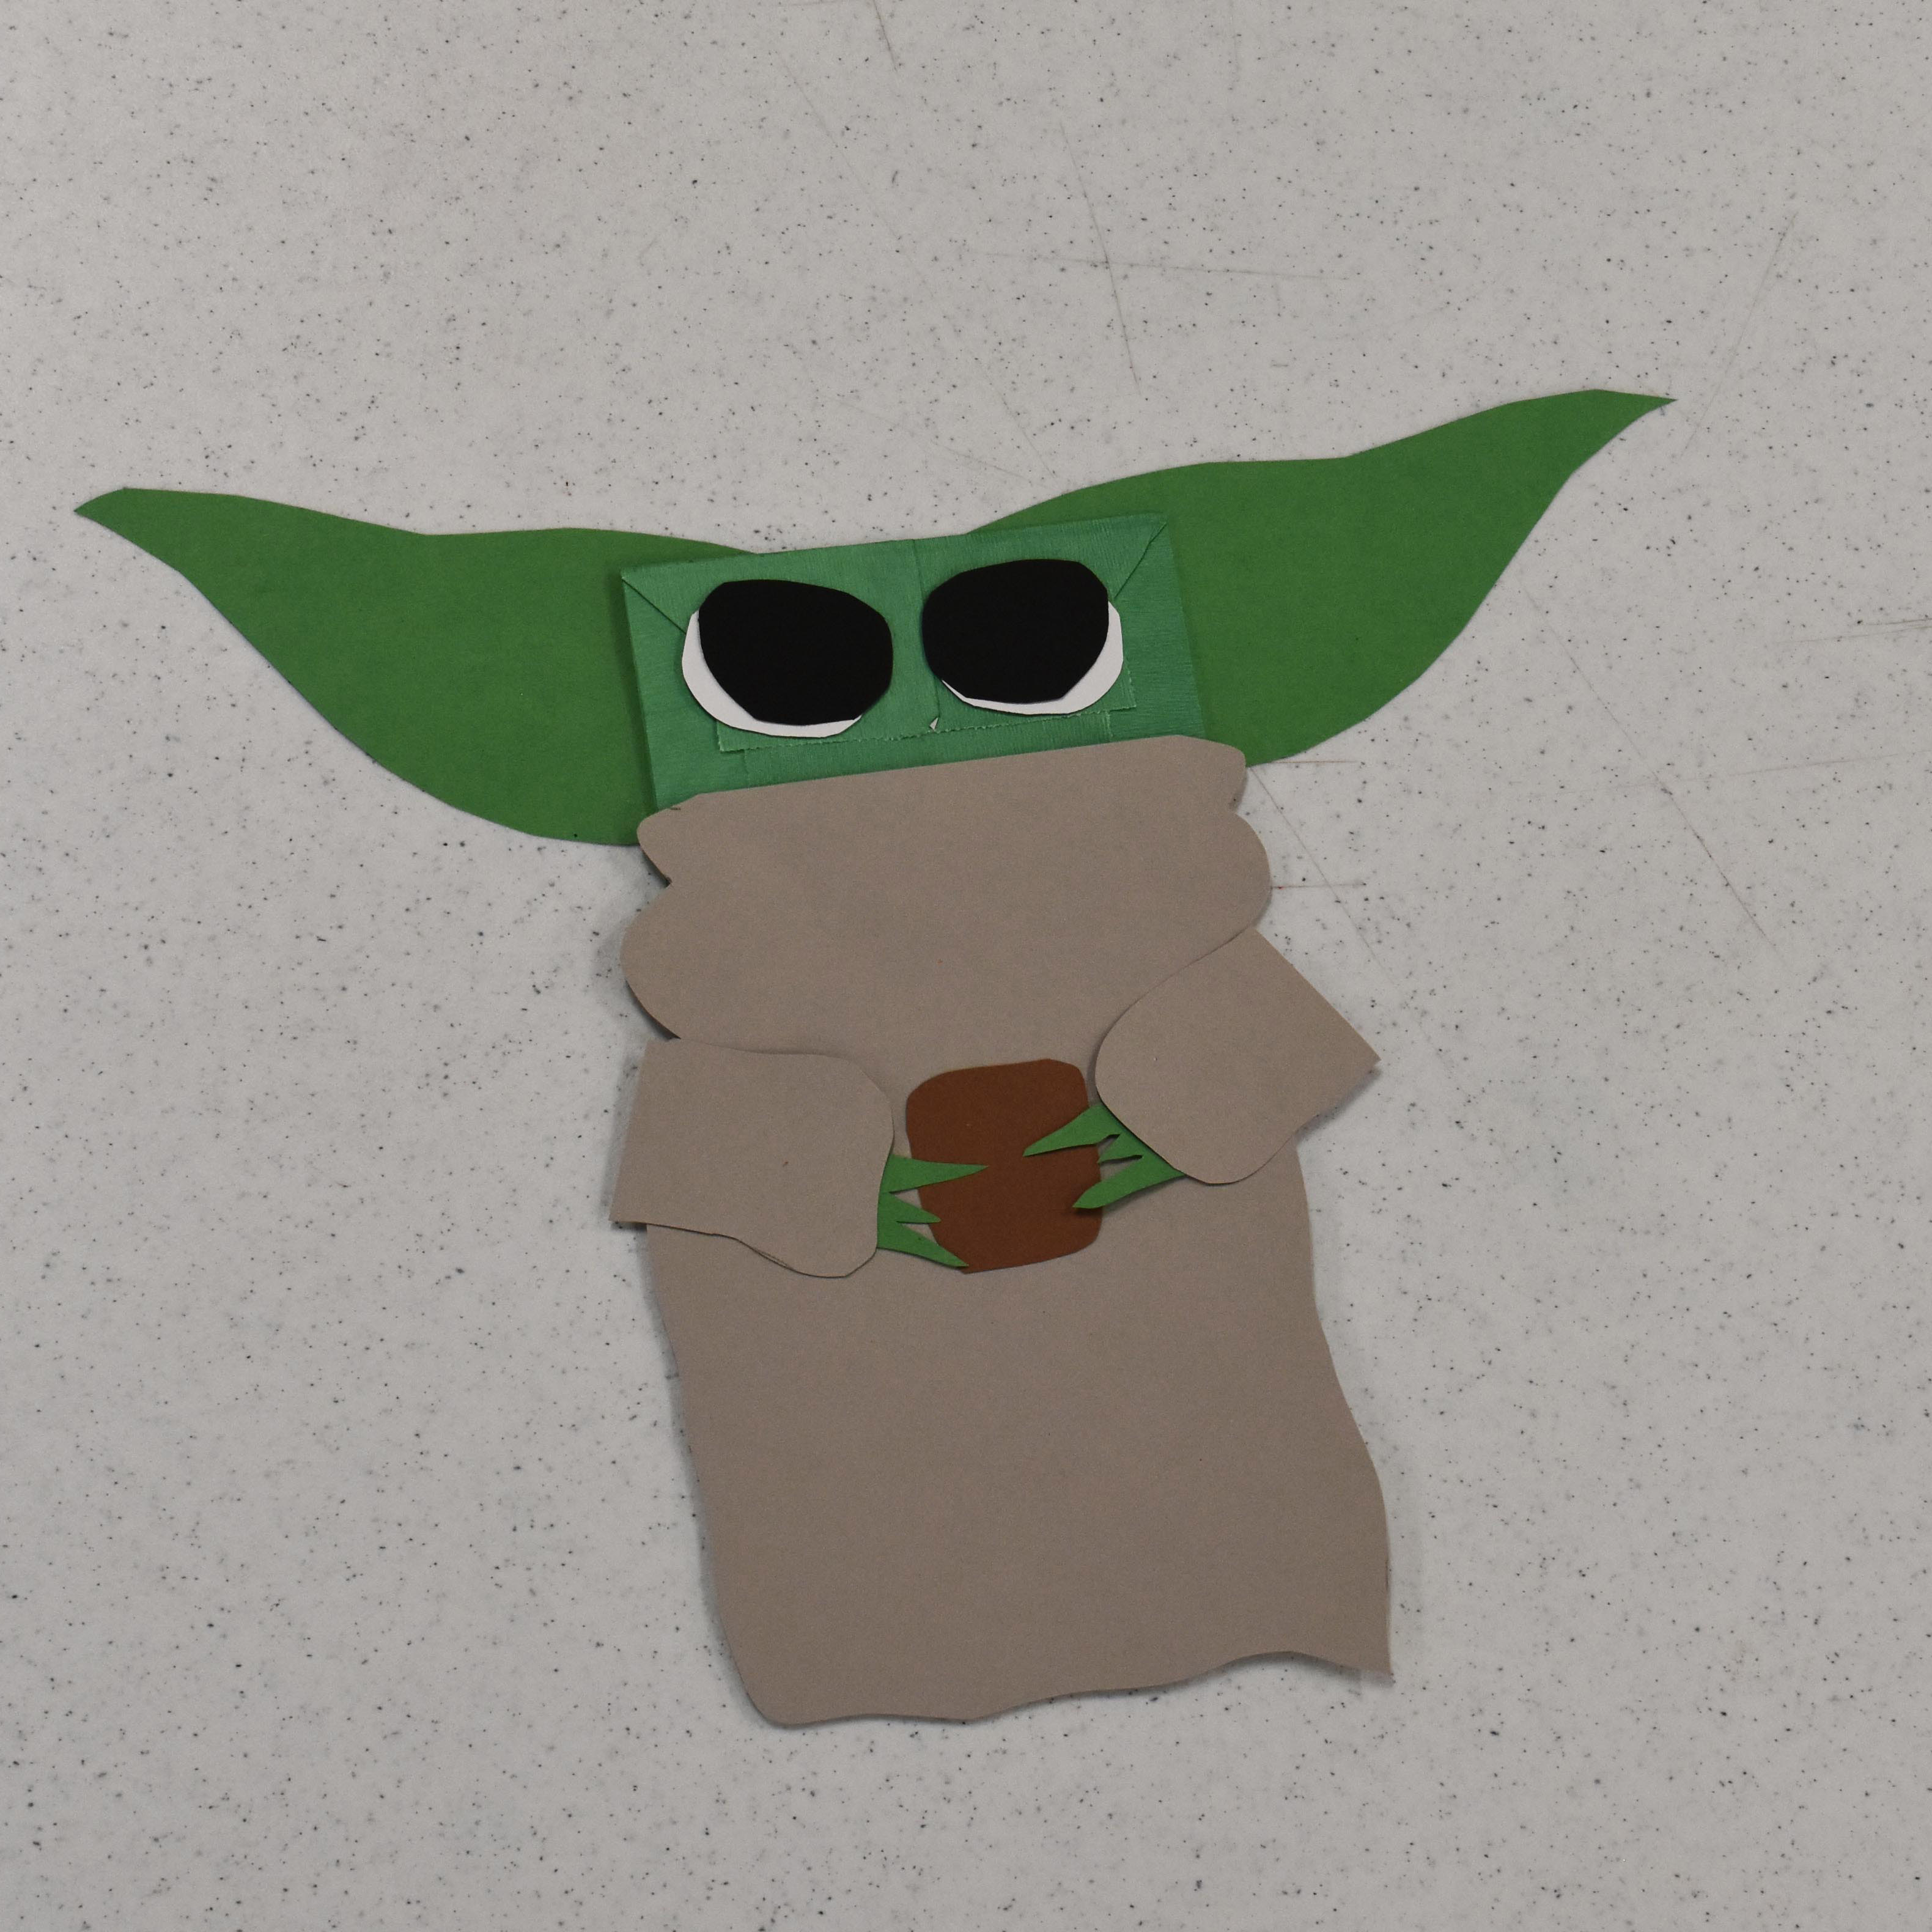
- Arrange all of the pieces on the bag (see photo below). This is a good time to trim the pieces if any are too large.
Next, you will glue the pieces to the bag.
- Glue the robe to the paper bag.
- Glue the hands to the arms. Glue the arms to the robe.
- Going under the hands, glue the mug to the robe.
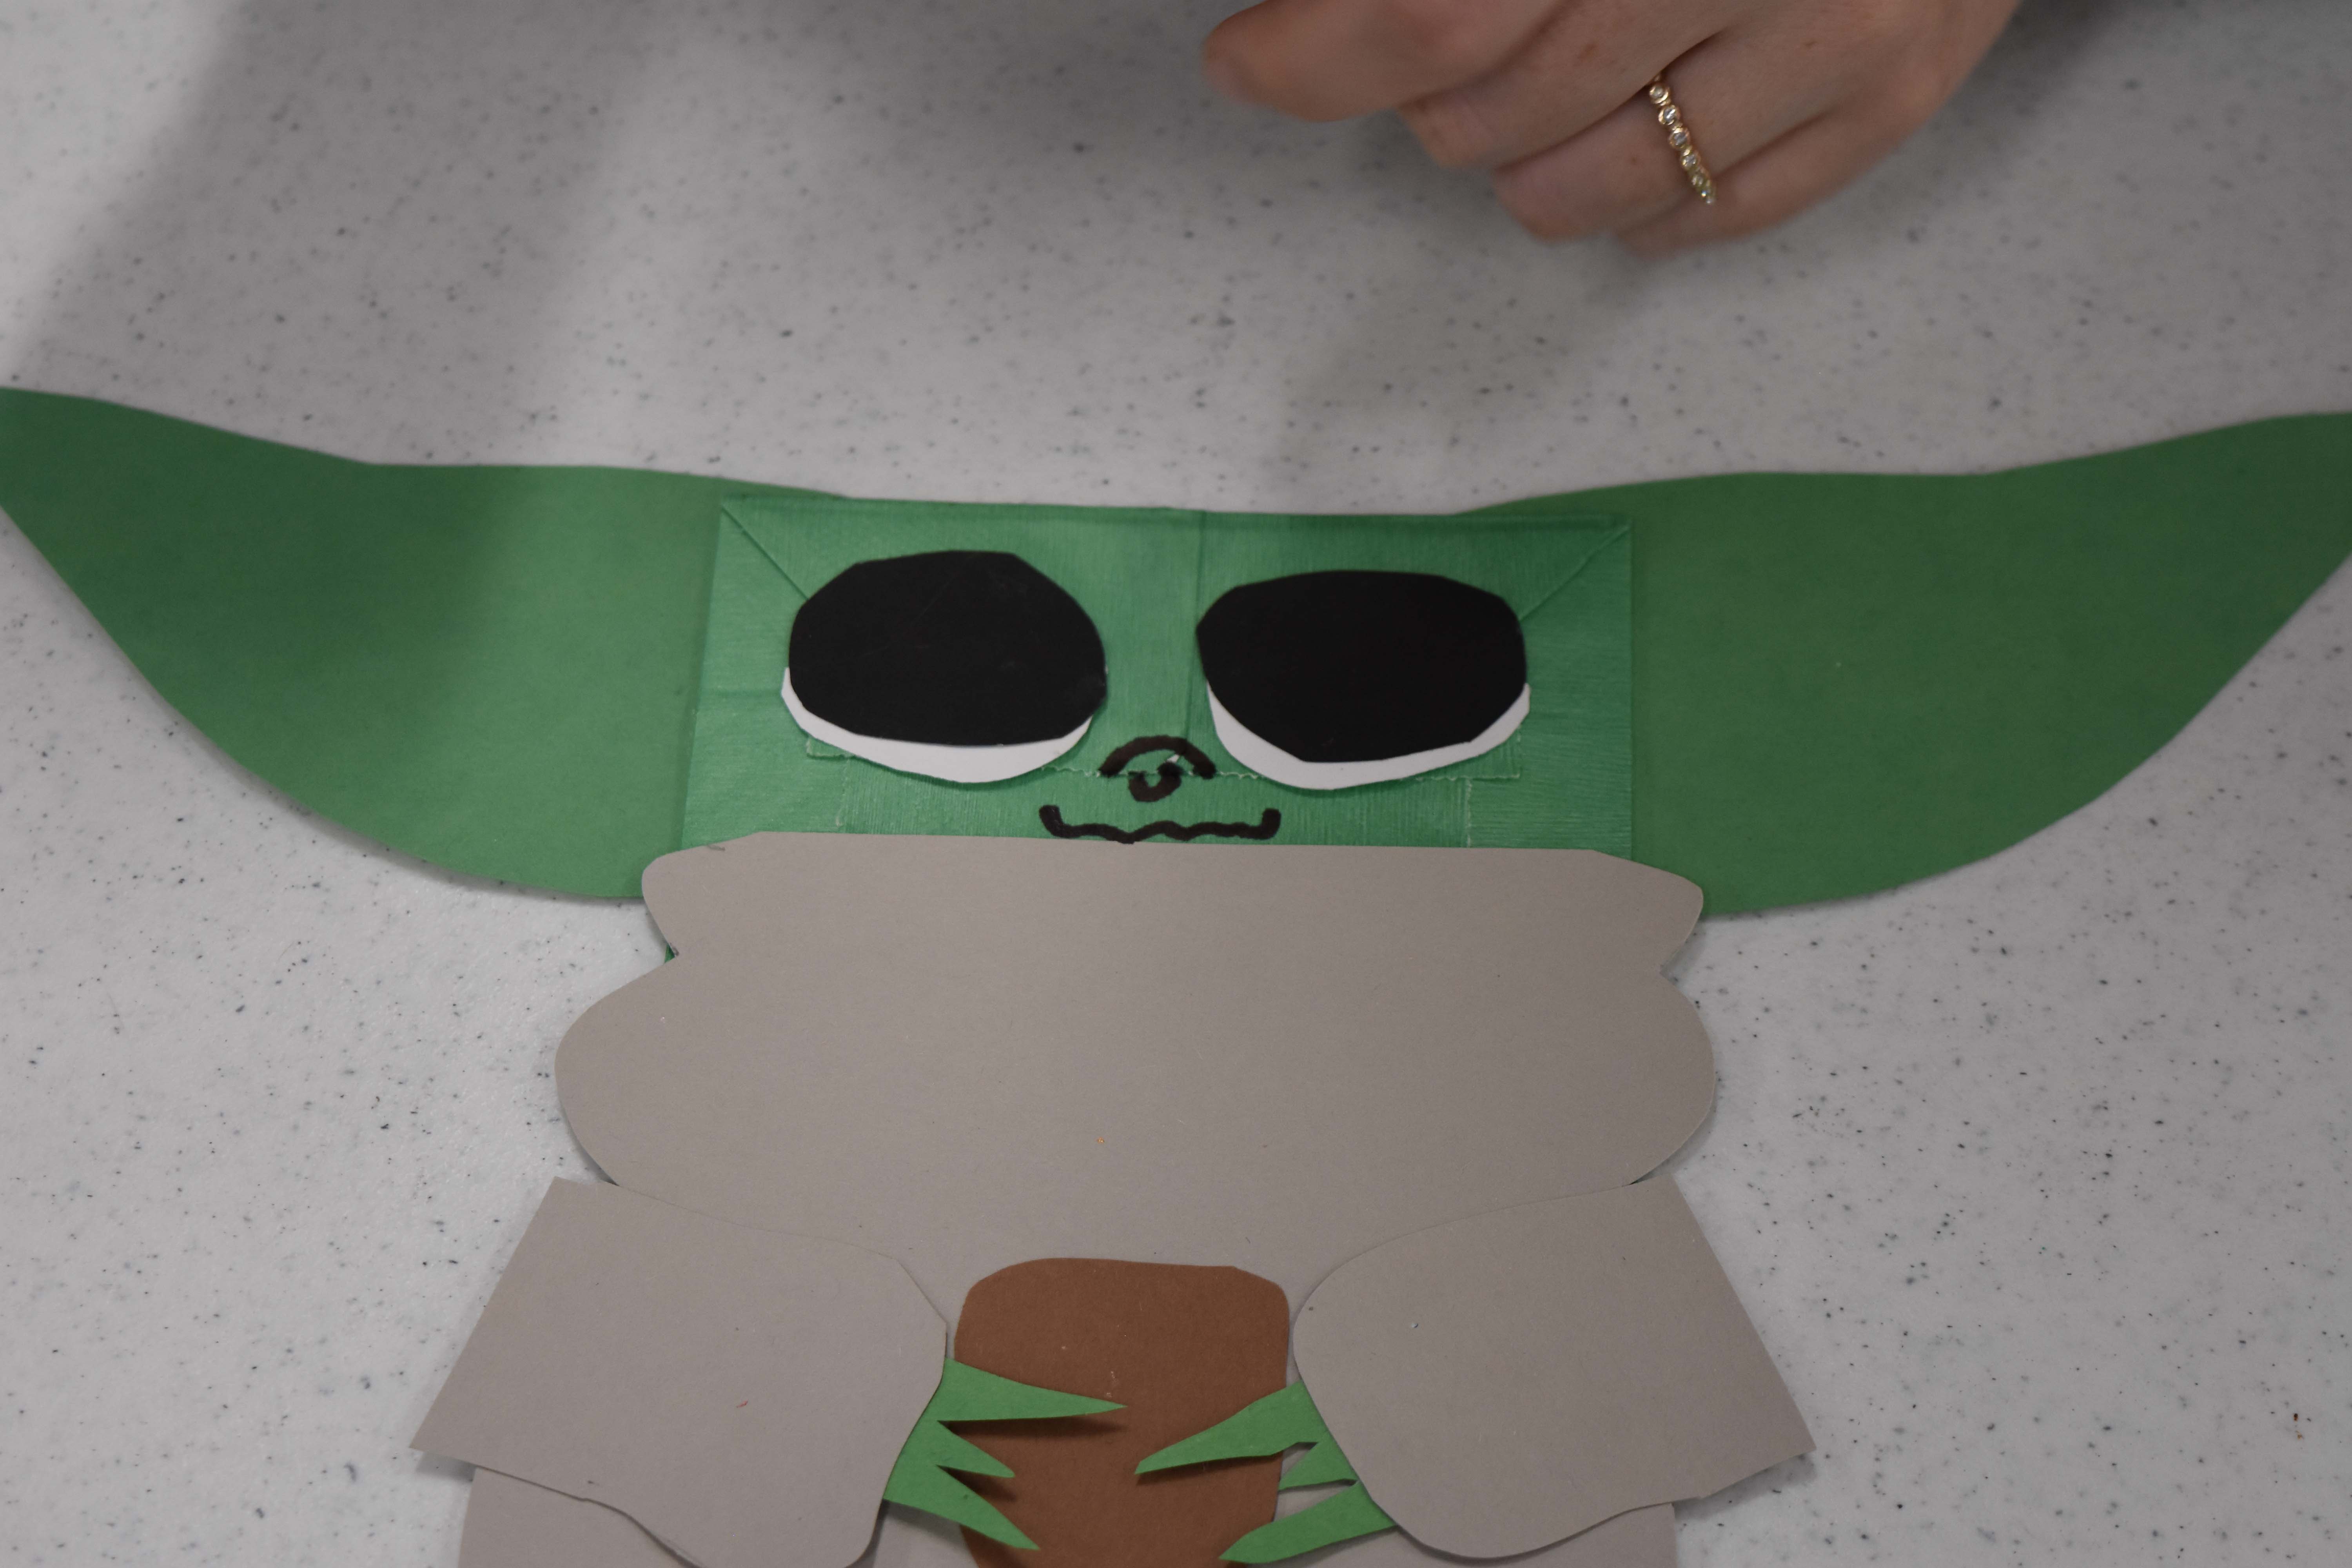
- Glue the white circle under the black circle. The white circle should poke out a little below the black circle to make the eyes. Glue the eyes to the bag.
- Glue the ears to the back of the bag.
The last step is to draw Baby Yoda’s mouth and nose. Enjoy your new paper bag puppet!
Star Wars Books & DVDs
View some of the Star Wars books, DVDs and video games available in our collection by clicking on the DVDs below.
More News